How to Create a Custom Stamp in Bluebeam
Bluebeam provides many general, preloaded stamp options within the program that work great, however, you may find that your organization/company may need to create customized stamps that contain more specific information, images/logos or signatures. Bluebeam makes it easy to customize stamps by providing an endless array of options, sizes, fonts, etc. It even allows date automation so that a stamp will contain the current date when you stamp a document without you needing to repeatedly change the date manually. Below are the steps on how you can easily go about creating your own custom stamp:
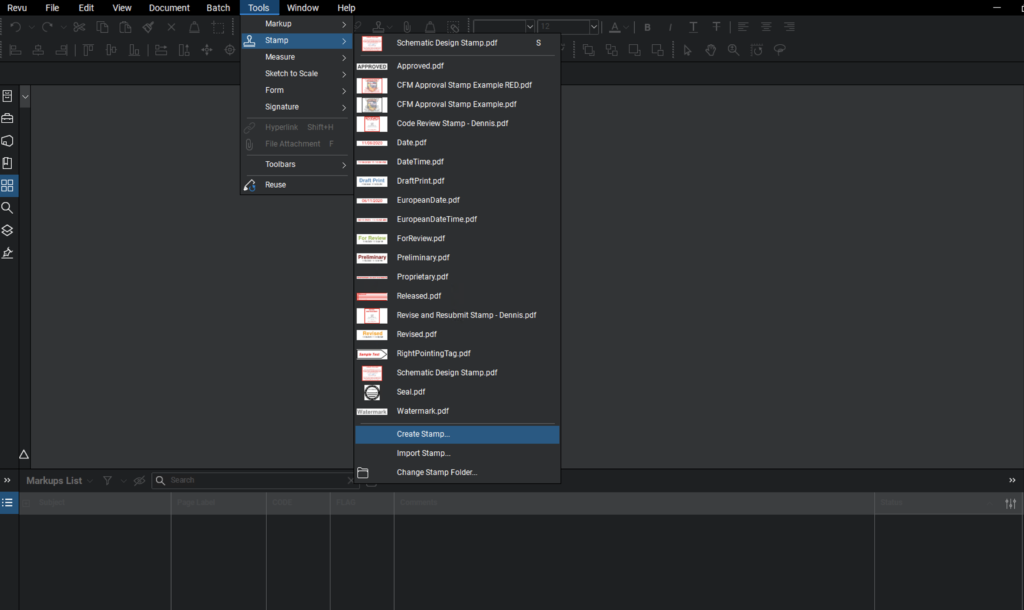
Go to Tools/Stamp/Create Stamp…
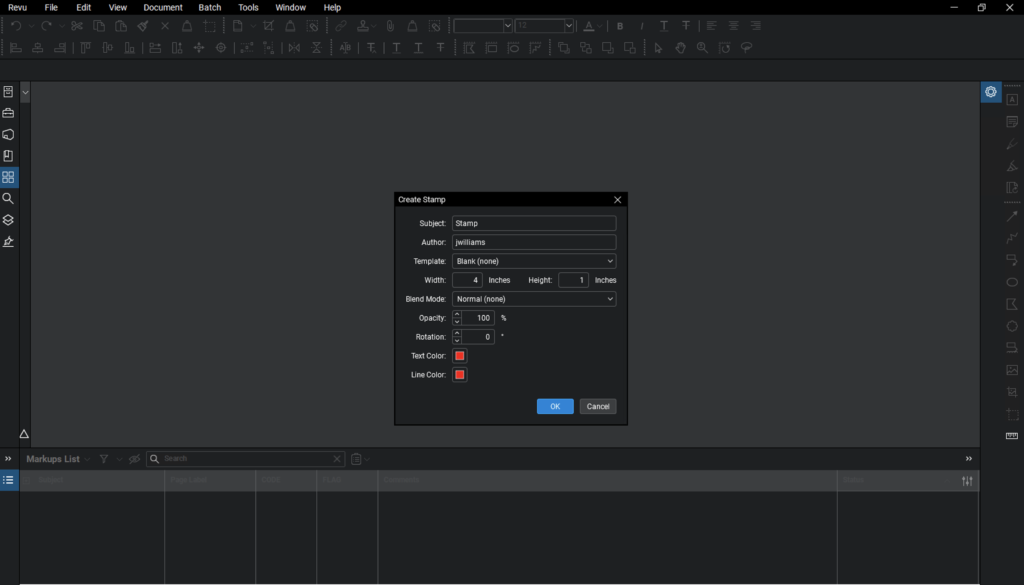
Next, a window will pop up as shown below. From this window, you will be able to customize things like size, text color, line color, etc.
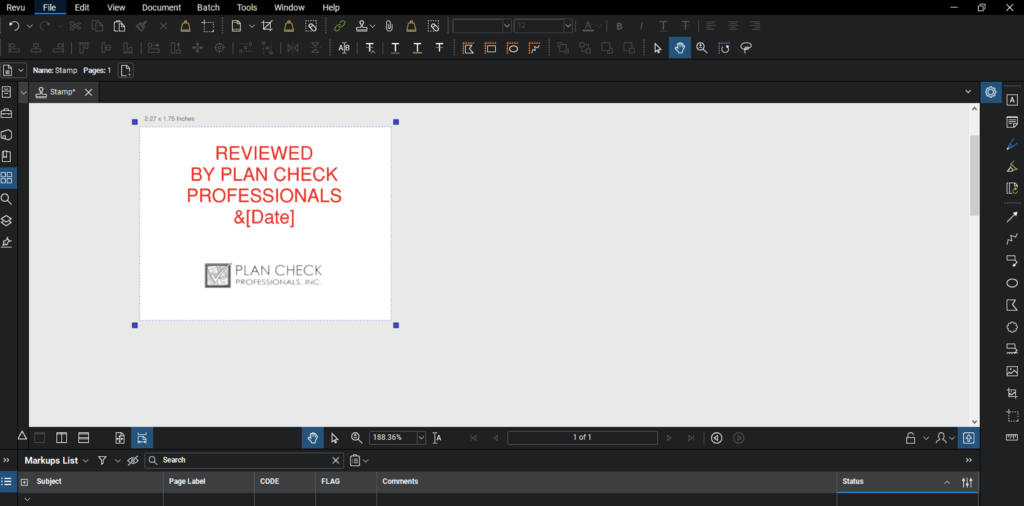
Once you have selected and customized the above options to your liking and you click ok, you can now manually add text, images, date, time, etc. that you would like on your customized stamp. If you want the date on your stamp to be automatically placed on the stamp for you when you go to stamp documents, enter the date as shown below in the example.
Go to save as once your stamp looks exactly how you want it to appear on your documents and save it in the Bluebeam Stamp folder, which it should automatically default to.
Your customized stamp is now ready to be placed on your set of documents. Open the document(s) that need to be stamped and then proceed to Tools/Stamp and find whatever name you gave your customized stamp in the list & select it.
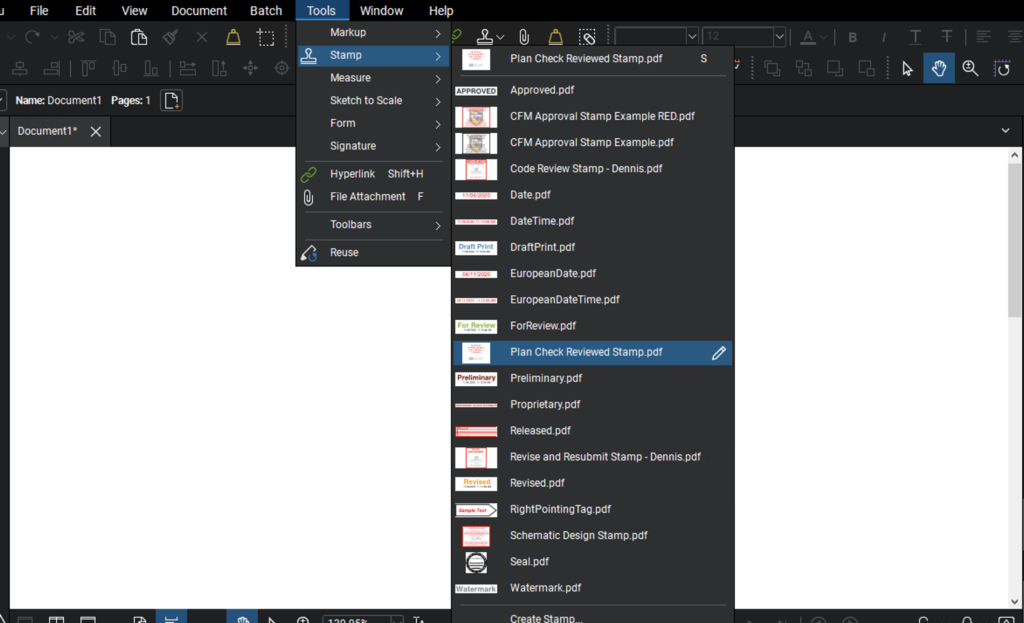
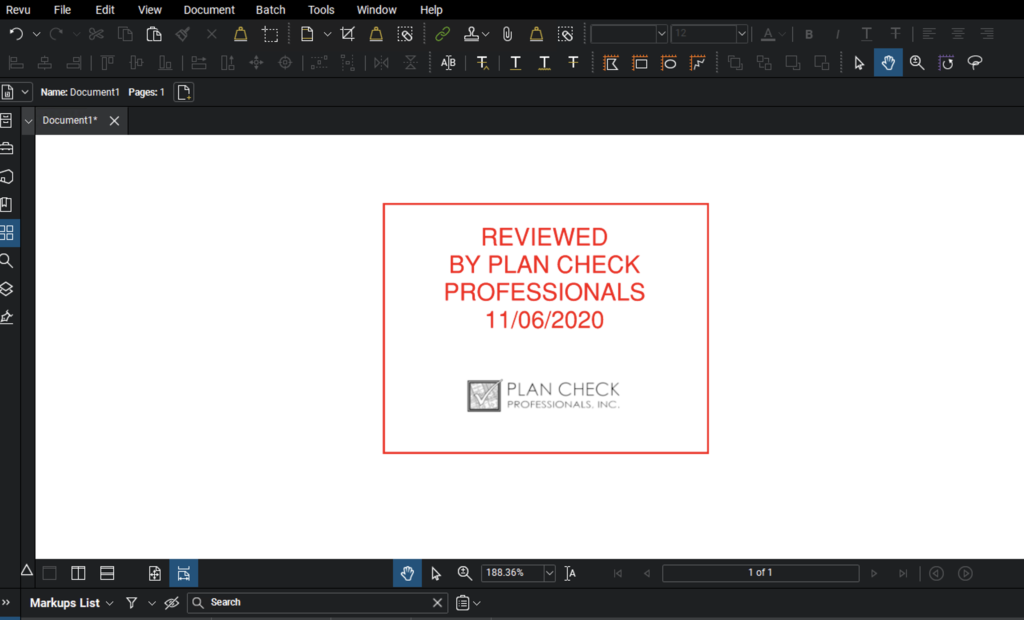
As you can see below, the date was automatically generated once the stamp was placed on the document.
We hope you found this brief tutorial on how to create your own customized Bluebeam stamp helpful. Please contact us for all your Bluebeam training needs.
